What is a recovery disk for?
Since Windows 8, Windows has added a new feature to create a recovery drive using a USB drive to troubleshoot and reset your computer when your computer is in serious condition. If you do not have a USB drive to create Windows 10 recovery disk, you can use a CD or DVD to create a system repair disc. Both types of recovery media allow you to use Windows recovery options even when your computer fails to load.If you cannot restore your computer, Windows recovery drive also gives you a chance to reinstall Windows 10. If your system crashes before you made a recovery drive, you can create a Windows 10 recovery USB disk from another computer to boot your computer having problems. However, the recovery drive will not work across different versions of Windows 10. In other words, you cannot use a Windows 8 recovery disk to restore Windows 10, nor can you use a recovery drive made by Windows 10 64-bit to boot a 32-bit computer.
How to create a Windows 10 recovery drive?
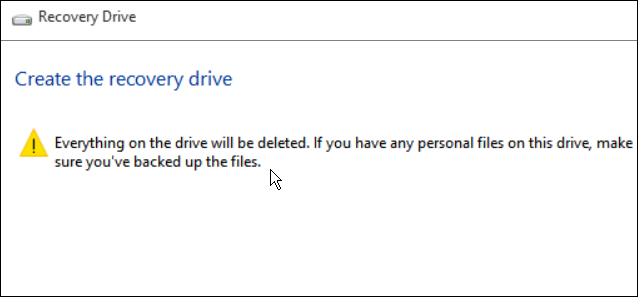
While creating a recovery drive, the program will copy a lot of files to the USB drive, so you need to prepare a flash drive that has at least 16GB capacity. Before you do, please note that all the data on the USB drive will be deleted in this process.1. Connect the USB drive to your computer, and then type “recovery drive” into the search box. In the listed results, select “Create a recovery drive”.
2. In the pop-out window, check the option “Back up system files to the recovery drive” and hit “Next”.
3. Then select the USB flash drive you prepared, and click”Next” to continue.
4. On the next screen, click “Create” to begin creating the recovery drive.
After finishing this process, you will see an option “Delete the recovery partition from your PC” if you have a Windows recovery partition on your hard drive. You can click it to delete recovery partition to free up some space on your computer. When your computer fails to boot, you can plug in this Windows 10 recovery USB drive to recover your system. You may need to change boot order in BIOS to make your computer boot from USB drive.
What to do when a problem occurred creating the recovery drive?
Burn recovery drive ISO to your USB drive
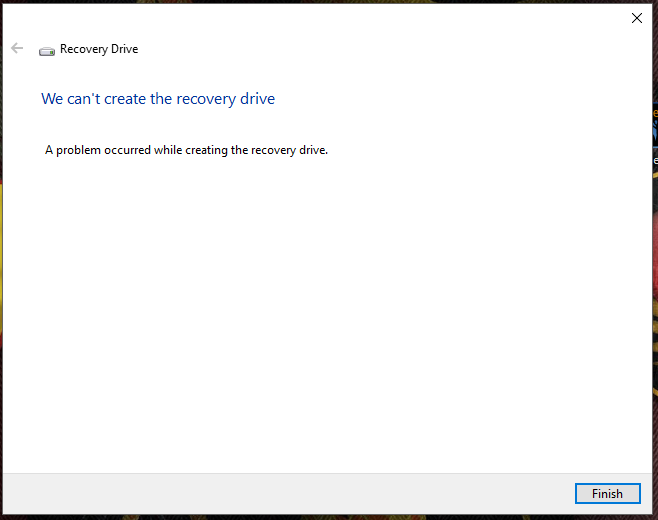
If Windows failed to create a recovery drive with an error “We can’t create the recovery drive”, you should first check whether your USB drive is well connected and can be recognized by Windows.If that is not the case, you can simply download the Windows 10 recovery disk ISO file and burn it to your USB flash drive or CD/DVD. If you do not want to download an unofficial file, then you can try to fix this issue.
Fix the problem we can’t create recovery drive
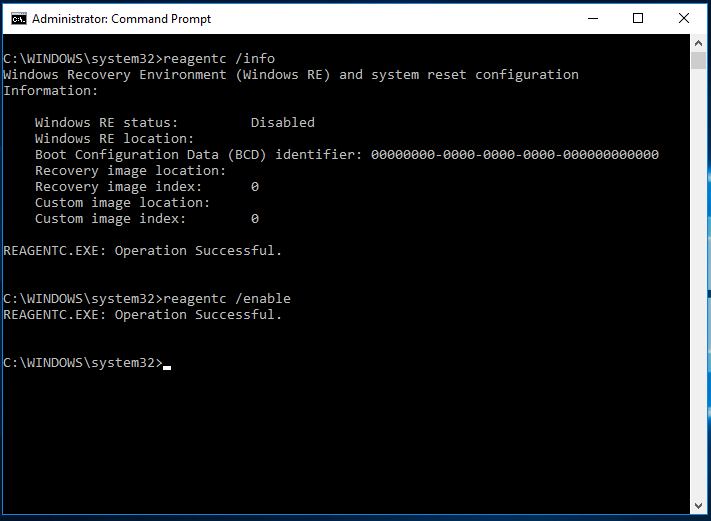
then the most likely cause of this problem is that Windows recovery environment is disabled. You can run command “reagentc /info” in an elevated command prompt to check it.With Windows RE disabled, you cannot even boot into recovery environment. To reenable it, just type “reagentc /enable”.
If this also fails, you can use Windows 10 installation ISO file to fix this problem.
Step 1. Create a Recovery folder under the root directory of C: drive if it is not already there. Then create a folder named WindowsRE under the Recovery folder. The recovery folder is hidden by default. You can search “show hidden files” from the search box to open File Explorer Options. From there, check the option Show hidden files, folders, and drives, and uncheck the option Hide protected operating system files(Recommended).
Step 2. Within this step to step4, you will create a Winre.win file. (If you have that file backed up or you can copy it from another Windows 10 computer, you can just skip to Step 5.) Open the installation ISO. If you do not have one, you can download it from Microsoft. In Windows 10, you can double-click to mount it as a virtual drive.
Step 3. In the Source folder, locate the file Install.wim. Copy the Install.wim file’s location path.
Step 4. In an elevated command prompt, type the following:
dism /mount-wim /wimfile:[the install.wim file path you just copied] /index:2 /mountdir:[a location path to save the mounted file]
so the command should be like this: dism /mount-wim /wimfile:"F:\windows 10 ISO\sources\install.wim" /index:2 /mountdir:D:\mount_image_file\
Step 5. From the location you entered at the end of the command, find the Winre.wim file and copy it to C:\Recovery\WindowsRe.
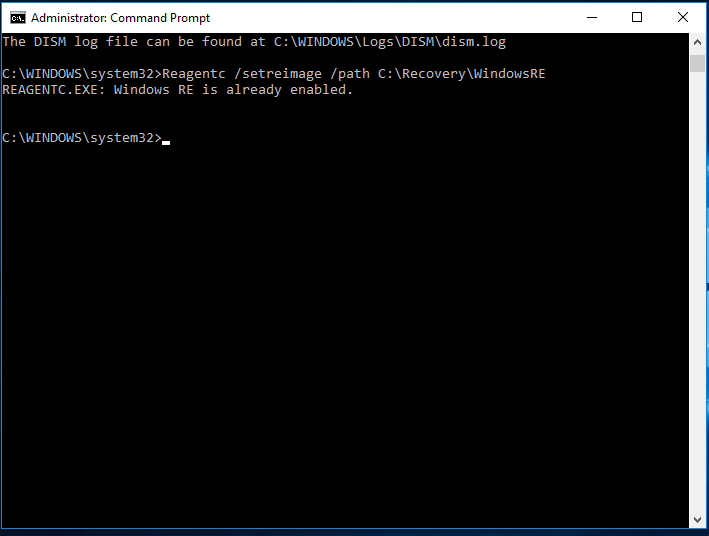
Step 6. Then type command “Reagentc /setreimage /path C:\Recovery\WindowsRE”(without quotes)
After that, you should be able to create recovery drive in Windows 10 successfully.
Failed to including system files
If you can create a recovery drive without including system files, but when you check the option Back up system files to the recovery drive, it is still unable to create recovery drive, then try the following.1. Copy the install.wim file from the Windows 10 installation file to a folder on your hard drive. Say it D:\Windows-OS-image.
2.Open an elevated command prompt, and type: Reagentc /setosimage /path D:\Windows-OS-image /index 1
After that, you should be able to include the system files on the recovery drive, so you can use the recovery drive to ret Windows 10 without requiring anything on your hard drive.
As mentioned, this recovery drive will not work on different bit of system. If you want a create windows 10 repair disk to boot any versions of Windows system, you can try another free backup and recovery software.
Another way to protect your PC
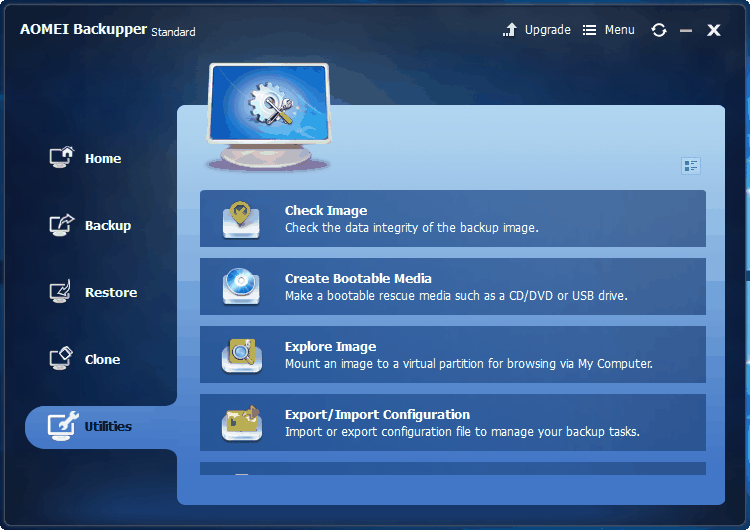
For a recovery media to boot any versions of Windows 10/8/7, you can use AOMEI Backupper Standard to create bootable media with DVD/CD or USB drive. It also allows you to create multiple types of backups including system backup, disk backup, file backup and partition backup. You can save the backup to your local disk, external hard drive or network shared folder. When your computer is unable to boot, you can use this bootable media to restore to an earlier date.To create recovery media with AOMEI Backupper:
1. Download this freeware. Install and run it.
2. In the Home screen, click “Utilities” and then select “Create Bootable Media”.
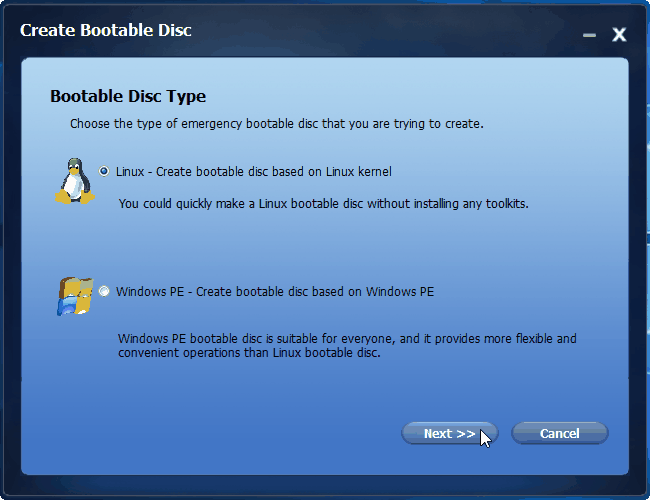
3. In the next screen, you can select bootable disc type from Linux based or Windows PE. Linux based bootable media only allows you to use basic functions of AOMEI Backupper, while Windows PE allows you to access full functions.
4. Then you can select a CD/DVD or USB drive to create this bootable recovery media and then click “Next” to run this process.
If you have computers running other versions of Windows system besides Windows 10, it is recommended to use AOMEI Backupper to create one recovery media for them all rather than create Windows 10 recovery disk for Windows 10, and another Windows 8 recovery disk for Windows 8. Whenever your system is unable to load, you can use it to restore system image



0 Comments
Post a Comment